BGP: Routed or Routing Protocol? Or…NONE LIKE IT HOT!

I think we need to cover something very basic before we get into this discussion:

BGP sucks.

Let’s face it.  BGP is probably the dumbest routing protocol currently deployed.  Even RIPv2 is smarter than BGP.  The other protocols out there (IS-IS [my staff manager fondly calls this Protocol Zero, by the way], OSPF, RIP, EIGRP [this isn’t a real protocol]) do everything auto-magically.  Seriously, it’s like magic sometimes.  Yeah, you have to come up with fancy things like stub areas, NSSA, and all of that jazz from time to time, but really, these protocols largely do everything on their own.  You just tell them the type of area you want them to be in, or that you want the router to be a stub router, or whatever, and they know exactly what you mean.

BGP, on the other hand?  Yeah, good luck.  First, you have to explicitly tell it what devices to peer with.  Then you have to specify the local-address (update-source if you’re a Cisco weirdo).  Then type internal or type external.  And being even remotely intelligent about what advertisements it sends where?  Not happening.

GTFO!

So now that you’re probably thinking I’m uneducated and just don’t understand BGP, let me ease those concerns.

BGP’s inability to function even remotely well on its own is also its greatest strength.  It gives the administrator absolute and total control over precisely how traffic enters and exits his administrative domain.  I’m not going to get into ‘how’ or ‘why.’  Everything I’ve written so far has just been a prelude to what has come before it.  And that is…

IS BGP A ROUTED PROTOCOL OR A ROUTING PROTOCOL?

As we’ve discussed, BGP is not capable of making intelligent decisions on its own.  It needs direction!  You can’t (realistically) use BGP as your IGP.  While technically possibly, it would be a very, very bad idea.  OSPF and IS-IS (zero protocol!) have a full topology of the entire IGP (at least the backbone does).  On top of that, they have areas that subdivide the network to conserve hardware resources and reduce the size of routing tables.  BGP really can’t do that.  For BGP to even be used as an IGP, you would have to create iBGP peerings based on interfaces and loopbacks, redistribute connected networks, and tune timers because BGP convergence is terrible.  Even then you would run into problems.  An iBGP-learned route does not get advertised to other iBGP peers, right? So you would have to be extra careful to make sure you are peering to everything in known existence in your network (that’s a little overkill, I know).

This all makes BGP incredibly pathetic as an IGP.  Why?  Because it’s stupid.  Very unintelligent.

What does this have to do with anything?

iBGP relies on the underlying IGP to form its iBGP peerings–if they’re based on loopback IPs (which they always should be).  This is because BGP, all by itself, without excessive and hideous configuration, can’t route traffic.  Check out the NEXT_HOP attribute for more information on that.

To make things short and sweet, the next-hop is not changed by default and requires recursive lookups–which are going to depend on the IGP.  And if it’s an externally learned route, well, you’re screwed (without setting next-hop self).

So what happens when packets travel between autonomous systems?  BGP contains an AS_PATH attribute that details the autonomous system path.  But that isn’t really relevant except as a primitive ‘shortest path’ indicator and loop-prevention mechanism.  There’s another attribute, the NEXT_HOP attribute, that does the ‘real work.’  And it doesn’t really do much work.  The router performs recursive lookups and relies on the IGP to get the traffic to whatever it knows the NEXT_HOP is.  And then the process repeats.  The first router in the next autonomous system does the same thing.

So BGP messages are actually routed.  They use the well-known TCP port 179.  This means IP connectivity must be established before messages can be sent and received–ultimately resulting in the establishment of a peering.  This is why, in the absence of an IGP, you would need to manually configure a full mesh of BGP peerings across every link in your network.  BGP has to have that IP connectivity.  These messages get routed across the IGP network to their destination.  TCP sessions are established by making use of the IGP.  In this manner, BGP is actually an application of TCP.

BGP’s Intent

With the above being said, however, what is the intent of BGP?  Why does it exist?  To establish inter-AS communication.  And how does it accomplish this?  By providing update messages containing routes.  Yes, the information contained in these messages is primitive at best, but it does contain the reachability information necessary to traverse multiple autonomous systems.  And that information is a prefix and a NEXT_HOP.  Oh, and that NEXT_HOP thing?  It’s going to rely on an IGP for recursive lookups to that NEXT_HOP in a lot of scenarios.  Because strictly speaking, BGP doesn’t need the AS_PATH to convey this information.  That information does not persist in a given IP packet from point A to point Z (unless that packet happens to be a BGP packet).  The AS_PATH attribute is there to give us finer control over inter-domain routing.  The AS_PATH attribute exists to prevent loops.  It exists to provide some measure of ‘shortest path‘ indication.

Wrapping Up

BGP is an amazing protocol. Extremely flexible, but incredibly stupid. It relies on everything else in the network to be right in order to function properly–more than most things. You can leave out a neighbor configuration for your IGP, but if you leave out a router out of the iBGP configuration, it could be detrimental. It is both a routed and a routing protocol.

I hope this has been informative. This was a concept that I truly did not grasp when I started my new job a few months ago. It has only been since working with BGP on a daily basis and read a few books on the matter (check my bookshelf) that I began to grasp this extremely important–and simple–concept.

As a final note, please find me and smack me across the head if I am wrong on any of the above points. I am still learning (always will be), but I feel pretty confident about the information presented here.

And the ‘Or…NONE LIKE IT HOT!’ thing was just because I was watching Futurama. It has no relevance to this article.

Cisco Exams Are Bad – Again

Some of you may or may not know that I recently had the joys of experiencing another Cisco exam – the CCNP ROUTE exam. I have some pretty negative views on Cisco exams; see my post here for a comparison of Juniper to Cisco exams.

I don’t want to break the NDA that every agrees to when they take the exam, so I will attempt to speak in the most general terms possible.

If someone specifies that the most specific mask should be used when specifying the ‘network’ command under any given ‘router’ hierarchy (and I use ‘hierarchy loosely–see Juniper’s JUNOS for a true hierarchy!), then that mask should be ‘0.0.0.0’. How can the mask be anything else? Please note I’m talking about wildcard masks and not subnet masks.

Second, if you are expected to use a simulated environment to answer questions or configure anything, then that simulated environment should actually work. If it doesn’t, then you’re intentionally setting a candidate up for failure–and for absolutely no good reason.

If a simulation does not allow something to happen, then I expect 100% that the average or below-average candidate would definitely fail that question. Only a highly experienced analyst or engineer would know for certain that they were right and that the simulation was wrong. My only concern is this: what if the simulation relies on the success of a given command–whether the failure of that command is the result of misconfiguration or a faulty simulation?

If anyone from Cisco is reading this, please take note. If your simulation software indicates that my verification method is to ping a given IP address and that does not work–even though I have verified the route through the network–this is probably not a good thing. My personal experience has allowed me to confidently continue, knowing I was right. But this could cause the average candidate to second guess his or her work. To be honest, it could even cause an experienced individual to fail if he or she is not a ‘good test taker.’

Perhaps Juniper will elect to progress to a test environment which includes simulations. I hope not, because their current ‘paper’-only methodology works and works well. I would like to think that they don’t use simulations because of the pitfalls of Cisco simulations. Regardless, I once again commend Juniper and look forward to the JNCIS-SP exam in October.

Yes, my BGP post is still coming, but this was quick and easy! 🙂

New Post Coming Soon: BGP

I’ve been gone a while.  Here’s what’s been up.


I am now a Network Analyst I in the Data NOC IP group.
I passed the ICND2 exam and now have my CCNA.
I have taken the ROUTE exam.
I am getting ready for the SWITCH exam.
I will be taking the JNCIS-SP exam in October.

I am working on a post regarding BGP.  Look forward to it!

Juniper Exams vs Cisco Exams

Juniper exams are interesting.  I’ve written before that they expect you to understand a lot of the underlying concepts before you take the exam.

The exams are entirely written.  They’re multiple choice, single answer and multiple choice, multiple answer.  This format works well, and even with this format they’re extremely difficult questions.  I, for one, am glad there are no labs or drag and drop questions.  Why?

I took a Cisco exam, the ICND1 or CCENT exam.  On this exam was a simulator.  In this simulator a question was asked inquiring about a connectivity issue.  Using the show interface <if-name> command revealed that the interface was up and up.  The problem is that this wasn’t an option in the answers.  And none of the other options were valid, either.  I was at an impasse.  Four options, none of them valid answers.  In desperation, I issued the show ip interface brief command.  I was shocked and amazed to discover that this command showed a different status for the interfaces than the show interface command.  I had my answer, but I almost missed a question because show interface and show ip interface brief showed two completely different statuses for an interface.  They should have had the same output, regardless of what Cisco was looking for.  This question was extremely unfair and very poorly designed and executed.

Because Juniper doesn’t use simulators, it doesn’t suffer from this problem.  Whether these potential bugs or “features” are the reasons for them not using simulators or not, I applaud them.  I cannot praise the simplicity of the Juniper Networks certification exams enough.  Without the complexities, there are fewer potential bugs or issues.  Yet their exams are still difficult enough to ensure their own validity and to validate the knowledge and skills of their candidates.

Juniper, please learn from this post and keep these points in mind.  I fully believe that simulators and the like can, will, and have prevented otherwise successful candidates from passing their exams.  I am even more displeased with Cisco after taking their exams.  And I’m more impressed by Juniper for avoiding the pitfalls that Cisco suffers from.

JNCIS-ENT Flashcards Now Available!

Sorry for the lack of updates. I’ve been spending some time with the Proteus Networks (twitter, website) Proteus Elite service and studying for the JNCIS very hard. I’ve also been very ill the past two weeks.

However, today, I bring you excellent news! I have created JNCIS-ENT flashcards! All questions and answers come directly from me–no other sources were used other than the Juniper FastTrack Routing and Switching guides for JNCIS-ENT.

Currently, the flashcards are available only in Microsoft Office format. I encourage you strongly to use only Microsoft Office to open this file if you wish to print them out and use them. There are some formatting discrepencies when you try to use Google Docs or Open Office/Libre Office to view this file. Later this week, I will be adding more cards, and at that time I will also make available versions that will format and print correctly when opened with Google Docs and Open Office/Libre Office.

JNCIS-ENT Flashcards

For the Love of Networking or How I Learned to Stop Worrying and Love the Bomb

People usually tell you to do what you love. What they may not tell you is that you probably shouldn’t do something unless you love it.

There are obviously exceptions to this. If you need the work and can’t get anything else, you have to do what you have to do. However, with IT, the rule of “do what you love” seems particularly harsh.

I realize more and more that, with IT in general, if you don’t love what you do, you won’t get very far. You’ll probably work at a Tier I help desk for the rest of your life. While someone has to do it (and while it can be an art itself), I think most people aspire for more. Unfortunately, if you don’t love it, you won’t get any further.

As I study for my JNCIS, I have realized more and more that if I didn’t really want this, there’s no way I could pass it honestly. Sure, I could use a brain dump (read here for why not to) and pass, but that wouldn’t get me very far. I would either bomb every interview or get lucky, get hired, and then get fired within 30 days as my employer realizes I cheated on the test.

This stuff isn’t extremely simple. It’s not overly difficult, but you’re going to hate it if you don’t crave it. And if you hate it, how far do you realistically expect to get?

If you love it, don’t worry. It will all come with perseverance and dedication. Just study, ask questions, and delve deeper and deeper.

JNCIS-ENT Question of the Week #1 –

Q:

Aggregate Routes and Generated Routes are very similar. What is one of the biggest differences between the two?

A:

Generated routes have a next-hop value of the first contributing route, whereas aggregate routes have a next-hop value of reject. Chris has it.

JNCIA Question of the Week #6 – Commit Requirements

Q:

With a clean Juniper router (one that is using the factory default configuration), what must be set before the router will allow you to commit configuration changes? How is this option set?

A:

Chris got it right, of course. Root passwords are required to save configuration changes in Junos. The command to do so is:
set system root-authentication plain-text-password

If you’re reading this and preparing for JNCIA-Junos, be sure you know this. Even if it’s not on the exam, it’s a pretty basic skill. Don’t use Brain Dumps!

Building a Juniper Lab with Remote Access – The Access Gateway

GNS3 is a great tool that can help us in many ways. One thing that may not be very evident, however, is how we can set up our GNS3 lab for remote access so we can practice when we’re not at home. The aim of this article is to show you how to do that.

This is part one in a series. This article describes how to install OpenBSD in a virtual machine (using VirtualBox). We go through the initial installation as well as assigning IP addresses to our interfaces. In part 2, we install Python and write a Python script that controls access to our gateway server.

This article assumes that you have already created virtual machines in VirtualBox before. If you have not, it is extremely intuitive. If you still need help, please see the VirtualBox website (here) or search Google.

Before we get started, here is our finished product in GNS3:

10 routers connected to a switch.  Two interfaces on a server connected to same switch.  Cloud connected to same switch

GNS 3 Topology

First, please create a new Virtual Machine with the OS type of BSD and OpenBSD. You can use the defaults throughout the wizard. Now open up the settings for the VM. Go to the storage tab and set the CD/DVD image to be the install50.iso you obtained from the OpenBSD website (here). Next, go to the Network tab. We need two interfaces. One will be bridged while the other will be internal.

The bridged adapter will be the one that is on our physical LAN. It is what will let us into the box. The internal adapter will get us to the actual GNS3 lab, but it will not automatically pass traffic between the GNS3 lab and our LAN (and thus the internet). In this way, although we have given ourselves remote access to the GNS3 lab (through this OpenBSD server), we have also isolated the GNS3 lab because there are no routes on the OpenBSD box. We will later use hostnames on the OpenBSD box to simplify accessing equipment, but there still will be no routes.

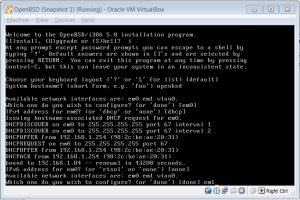
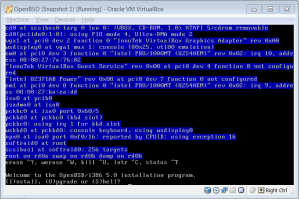
Next, start your VM. Press enter at the “boot>” prompt. The system will run through some internal loading and present you with the following screen:

Installation screen for OpenBSD 5.0

Installation Screen

Please accept the defaults until you get to the network configuration. For em0, we will want to use DHCP. This is our first adapter–the one that is bridged. When that is finished, you should see it ask you if you wish to configure any additional interfaces. We do. Type “em1.”

The screen for if em1

Interface em1 Configuration

Now we need to enter some information. I use the following to match the requirements of my GNS3 lab:

  • IP Address – 10.0.0.1
  • Subnet Mask – 255.255.255.240 – This mask accommodates 14 interfaces total. My lab example has 11.

The installation will ask you to set a root password. Do this. Also create a new user with a password. Enable sshd by default. Disable root login for sshd.

Enter defaults until the system asks if you want to use a graphical environment, XWindows. Say no here. We don’t need a GUI.

No GUI option

Removing X Windows

Again, accept defaults until it asks you if you would like to create a new add or remove packages. YES! We want to remove all of the XWindows packages and the games package. Prepend the package name with a hyphen to remove it. So, enter the following commands:


-xserv50.tgz
-xfont50.tgz
-xshare50.tgz
-xetc50.tgz
-xbase50.tgz
-games50.tgz

Removing X WIndows and Games

Remove Packages

If there are more prompts, accept defaults. Finally, type reboot to restart the system. Remove the installation media.

At this point, we have a working OpenBSD system and gateway to the GNS3 network. We could stop here, but we are going to go farther in future articles because we might want to have access to this system for more than one person.

To access your network, be sure you open your firewall to the IP of your OpenBSD system. SSH to your public IP. You will be directed to your OpenBSD server. From here, ssh or telnet to your GNS3 routers.

Please ask if you have questions!

Preparing for Certification Exams

Disclaimer

I’m going to say at least one controversial thing in this post–probably more–so be prepared! As with anything anyone else tries to tell you to apply to your life, take it with a grain of salt.

Everything I say here is my opinion. This is what works for me. I don’t guarantee that it will work for you, but it might. Take what you will away from this article.

Learn

The first is the most obvious. Take time out of your day to learn whatever it is you want to take a test on. Please see my previous article on brain dumps and why not to use them, entitled How to Trivialize a Certification in 10 Days – They’re Called Brain Dumps for a Reason.

Take at least 30 minutes to an hour out of your day to study. If you take more than thirty minutes, I suggest that you study in thirty minute blocks. So if you want to study for an hour each day, then take a 15 minute break in the middle. There are numerous scientific studies that show our ability to absorb information after twenty minutes is significantly reduced. Google them.

I usually try to fit in around two hours per day when I initially learn a topic, so my schedule tends to look like this:

  • Read for Half an Hour
  • Fifteen Minute Break
  • Watch Videos (or Read) for Half an Hour
  • Fifteen Minute Break
  • Pratice Hands-On (or Read) for Half an Hour
  • Fifteen Minute Break
  • Review Information I’ve Already Learned–CUMULATIVE!–for Half an Hour

This means that at the end of every day, I spend the last thirty minutes of every day doing a cumulative review of everything I’ve learned so far. I’m also doing labs for half an hour–if the exam requires any decent amount of hands-on activity. In effect, I am only learning new material for around an hour per day. This is my schedule, and it may not work for you.

Review

Again, this should be expected. After you have learned all of the information, spend time every day reviewing all of it. I generally spend an hour each day at this point, but I typically don’t take the previously recommended break in the middle of reviewing, either. This is because I have already learned the information and really only need to emphasize certain points. With that being said, I still have structure to my review. I still divide my time in half–just without the break between. I spend the first thirty minutes studying a specific subject that I know I was struggling to grasp. The last half of my one hour block is spent doing a cumulative review–typically all of the Q&A from a book or practice tests (NOT BRAIN DUMPS!).

Schedule the Exam

This is one of the most important parts. Schedule your exam! If you don’t schedule it in advance, you’ll never schedule it. You’ll never crack down and really start learning.

When you do schedule it, think about work. Take the before an exam off from work. No excuses, and no reason not to. Also, read the next section about SLEEP and schedule your exam for two hours after you plan to wake up on exam day. If you are more than thirty minutes from the testing site, schedule it out farther than two hours.

Sleep

I want to make a quick point. Sleep is good. We function well on sleep. I would like to make a recommendation to you. On your days off, go to sleep and don’t set an alarm. Record the time that you go to sleep. If you have kids, ask your wife/husband to take care of them until you wake up. Do not let anything interrupt your sleep! When you wake up, it will be natural. Immediately record the time! Now do a little math and find out how long you slept before your body (not outside influences) decided it was recharged.

Repeat the process above on at least three separate occasions (I recommend five). Average the time out. This should give you a decent idea of how much sleep you really need. Remember this number as we’ll be considering it very shortly.

The Day Before

Don’t study. The truth is that if you need to study the day before the exam, then you don’t know the material well enough to take the exam. If you feel you need to study the day before, just reschedule it. There’s no shame in it, but until you are confident that you no longer need to study or review the day before an exam, you are taking too much of a chance.

With that said, don’t watch T.V., either. You don’t want to do anything that is going to fill your head with nonsense. T.V. rots your brain! Engage in constructive–but trivial–activities. Go for a walk. Work out. Spend some time with your family (but don’t watch T.V.). Play a board game. Write. Anything that does not fill your head with new knowledge.

Now is also the time to plan your time before the exam.

Decide when you need to go to sleep to accommodate the previously mentioned “magic sleep number.” If you are thirty minutes or less from the test site, make sure you are awake two hours before your scheduled time while still accommodating that magic number.

For example, my magic number is around 9 – 10 hours. I live fifteen minutes from a test center. I go to sleep at 10PM and wake up at 8AM. I schedule my tests for 0945 – 1000 in the morning.

All of this time, from the moment you go to sleep until you pass the exam, is time for you. Get your significant lover to watch the kids. Before you go to sleep, lay out everything you need for the exam. Clothes, identification, keys, and your breakfast. Make sure your car has gas.

Shower the night before the exam. Eat a large, healthy dinner. Go to sleep.

Exam Day

First and foremost: you want no distractions today. Beg your spouse to take care of the children, the dog–whatever has to be done that cannot wait until you get back.

Wake up. If you drink coffee, go ahead and get your one single cup out of the way. Eat a small breakfast. You definitely do not want things sloshing around and making you sleepy while you’re testing! By the same token, you don’t want to be hungry. Find that happy medium, and eat something halfway decent.

Plan to leave your house at such a time that you can arrive at the testing center a minimum of fifteen minutes early. My center lets me start early, so I typically leave as soon as I’m ready.